Kitchen Faucet Hose Replacement: Easy Step-by-Step Guid
Introduction
When a pull-down or pull-out faucet begins to feel stiff, twists easily or drips water under the sink, the problem is likely caused by the hose.
Easy to overlook, as it’s hidden under the sink and does its job without making any noise until it can’t. The fortunate part is that a Hansgrohe kitchen faucet hose replacement is a manageable task even for most homeowners, without plumbing experience.
When Does a Kitchen Faucet Hose Need Replacement?
Some typical signs indicate it’s time to replace your faucet hose:
- You can identify visible leaks – Water around the hose connections and under the sink is a good indicator.
- Limited range of motion – If the hose is stiff or prone to kinking, or if it does not retract smoothly, it could be getting worn out.
- Cracks or visible wear – If there are cracks, splits or discoloration on the exterior of the hose, it is an indicator that the hose is aging.
- Poor or intermittent water pressure – In some cases, this could be because of a hose problem and not the faucet head.
Sticky or tight – If the pull down or pull out mechanism is sticky or tight, the hose may be to blame.
What You Need Before Starting
Before you begin, you should know the following:
- When replacing your kitchen faucet hose, keep a few tools and supplies on hand:
- A new hose which is suitable for your Hansgrohe faucet model
- A wrench and/or pliers that can be adjusted.
- A bucket or towel to collect any water that may be left behind.
- A flashlight, because often under sink spaces are dark
- The written instructions placed on your faucet (if applicable) for model specific information.
How to Perform a Hansgrohe Kitchen Faucet Hose Replacement
Always turn off the water before connecting to or disconnecting. Turn your water off at the supply lines, which can be found under your sink, clockwise until they are completely closed. After the water has stopped flowing, turn the faucet a little to drain any water out of the line, and clear the area under the sink to create space for comfortable working.
How to Remove the Old Hose
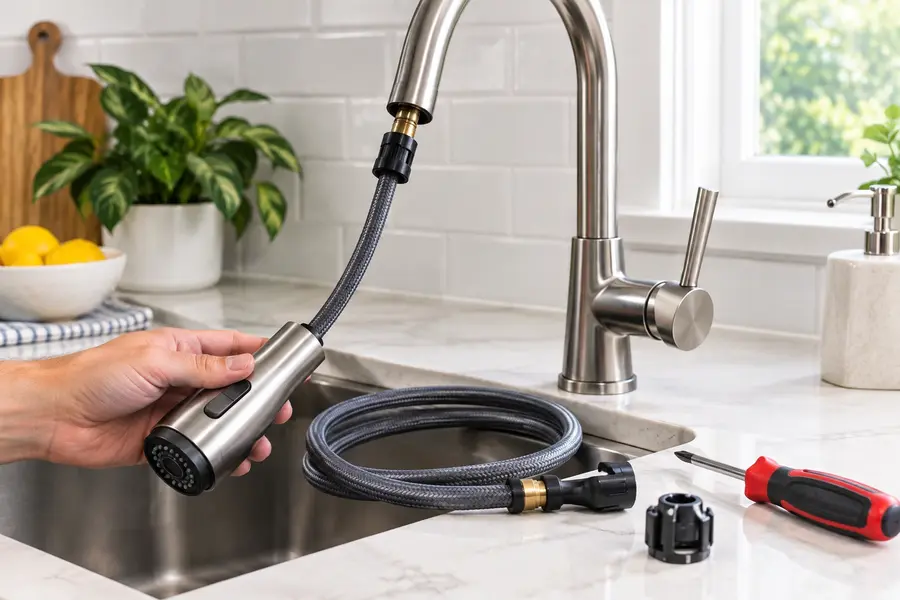
Once the water is off, find the location of the hose and it is likely to be under the sink. Using your wrench or pliers, carefully loosen the connection nut. Keep a small bucket or towel available for a spill of water, as it may get some water to drip.
How to Install the New Hose
With the new hose, line it up with the connection on the faucet body. Thread it on by hand first to prevent it from being cross threaded and then use your wrench to tighten it up, but don’t over tighten it. If the hose is also attached to a spray head at the other end, attach that too, just as carefully, using the hand first technique.
How to Check for Leaks After Replacement
Once the water is off, find the location of the hose and it is likely to be under the sink. Using your wrench or pliers, carefully loosen the connection nut. Keep a small bucket or towel available for a spill of water, as it may get some water to drip.
Common Mistakes to Avoid
- Properly installing the new hose.
- With the new hose, line it up with the connection on the faucet body. Thread it on by hand first to prevent it from being cross threaded and then use your wrench to tighten it
- Up, but don’t over tighten it. If the hose is also attached to a spray head at the other end, attach that too, just as carefully, using the hand first technique
How to Choose the Correct Replacement Hose
Once installed, gradually re-open the water valves. Turn on the tap for a minute or two, paying special attention around both points of connection for any drops and/or moisture. A quick placement of a dry paper towel near the connections is a good way to detect small leaks that may not be readily apparent.
When to Call a Professional
Once installed, gradually re-open the water valves. Turn on the tap for a minute or two, paying special attention around both points of connection for any drops and/or moisture. A quick placement of a dry paper towel near the connections is a good way to detect small leaks that may not be readily apparent.
Repair vs. Replacement Comparison
| Factor | Repairing Existing Hose | Replacing the Hose |
| Cost | Lower, if only minor fixes needed | Slightly higher due to new part cost |
| Time | Quick for small fixes | Moderate, involves full removal and installation |
| Difficulty | Generally simple | Straightforward but requires careful handling |
| Reliability | Temporary if hose is worn | More reliable long-term solution |
| Suitable Situations | Minor, non-structural issues | Visible wear, leaks, or reduced flexibility |
Conclusion
You need not be afraid of replacing the hose on a Hansgrohe kitchen faucet. Most homeowners can complete this repair task without the aid of a professional with a little patience, using proper replacement hose and a water shut off.
Keep in mind that the hose can be different depending on the model and always check your own Hansgrohe faucet against official instructions before you purchase a replacement part, to avoid wasting time and avoid frustrating yourself.
FAQs
Should I shut-off the water when replacing a faucet hose?
Yes, always turn off the water supply valves under the sink prior to any hose replacement.
Do all Hansgrohe faucet hoses fit the same?
The answer is no, hose length and type of connector will differ by model so make sure to check
Is it possible to replace a faucet hose without the use of tools?
Minimal tools to loosen and tighten connections properly are a wrench or pliers.
What’s the problem? Is it the hose or the faucet head?
Carefully check both the parts, any visible cracks or leakages near the hose suggest that the hose is the problem.
If the new hose leaks, what should I do then?
Shut off the water and make sure that all connections are tight and even before using the water again.